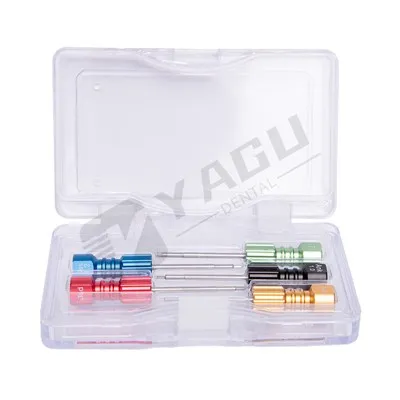
Hey there! As a supplier of Implant Screw Drivers, I've seen firsthand how important it is to keep these tools clean. Not only does proper cleaning extend the lifespan of the screwdrivers, but it also ensures they function at their best, which is crucial in a dental setting. In this blog, I'll share some tips on how to clean implant screw drivers effectively.
Why Cleaning Implant Screw Drivers Matters
Before we dive into the cleaning process, let's talk about why it's so important. Implant screw drivers are used in delicate dental procedures, often coming into contact with blood, saliva, and other bodily fluids. If not cleaned properly, these contaminants can lead to cross - contamination between patients, which is a huge no - no in the dental industry. Additionally, debris buildup can affect the performance of the screwdriver, making it harder to achieve a precise fit and potentially leading to implant failure.
Step 1: Pre - Cleaning Inspection
The first step in cleaning implant screw drivers is to do a pre - cleaning inspection. Check the screwdriver for any visible debris, such as bone chips or tissue fragments. You can use a magnifying glass if necessary to get a closer look. If you notice any damage, like a bent tip or a loose handle, set the screwdriver aside for repair or replacement. It's important not to clean a damaged tool, as it may not function properly even after cleaning.


Step 2: Manual Cleaning
Once you've inspected the screwdriver, it's time for manual cleaning. Start by rinsing the screwdriver under warm, running water to remove any loose debris. Then, use a soft - bristled brush, like a toothbrush, to gently scrub the entire surface of the screwdriver, paying special attention to the tip and the grooves. You can use a mild detergent or a specialized dental instrument cleaner. Make sure to get into all the nooks and crannies to remove any stubborn dirt.
While we're on the topic of dental tools, if you're interested in other dental implant tools, check out our Dental Implant Screwdriver and Bone Chip Maker.
Step 3: Ultrasonic Cleaning
After manual cleaning, ultrasonic cleaning is the next step. Fill an ultrasonic cleaner with a suitable cleaning solution according to the manufacturer's instructions. Place the screwdriver in the ultrasonic cleaner and let it run for the recommended time, usually around 10 - 15 minutes. The ultrasonic waves create tiny bubbles that implode, effectively removing any remaining debris from the surface of the screwdriver.
It's important to note that not all implant screw drivers are suitable for ultrasonic cleaning. Some may have components that can be damaged by the ultrasonic waves. Always check the manufacturer's guidelines before using an ultrasonic cleaner.
Step 4: Rinsing and Drying
Once the ultrasonic cleaning is done, remove the screwdriver from the cleaner and rinse it thoroughly under warm, running water to remove any traces of the cleaning solution. Then, dry the screwdriver completely. You can use a clean, lint - free cloth to wipe it down, or you can let it air dry. Make sure the screwdriver is completely dry before moving on to the next step, as moisture can lead to rust and corrosion.
Step 5: Disinfection and Sterilization
The final step in cleaning implant screw drivers is disinfection and sterilization. There are several methods you can use, such as steam sterilization, chemical disinfection, or dry heat sterilization. Steam sterilization is the most common method, as it's effective at killing a wide range of microorganisms. Place the dry screwdriver in a sterilization pouch and then in the autoclave. Follow the manufacturer's instructions for the correct time and temperature settings.
Chemical disinfection can be used as an alternative, but it's important to choose a disinfectant that is approved for use on dental instruments. Make sure to immerse the screwdriver in the disinfectant for the recommended time and then rinse it thoroughly.
Storage
After cleaning and sterilizing, proper storage is essential to keep the implant screw drivers clean. Store the screwdrivers in a clean, dry place, preferably in a dedicated instrument cabinet or a sterilized container. Keep them away from dust, moisture, and other contaminants. You can also use a protective case to prevent damage during storage and transportation.
Tips and Tricks
- Regular Maintenance: Make cleaning and sterilizing implant screw drivers a regular part of your dental practice's routine. Set a schedule and stick to it to ensure the tools are always in good condition.
- Training: Make sure all your staff members are properly trained on how to clean and sterilize implant screw drivers. This will help prevent errors and ensure the tools are cleaned correctly every time.
- Inspect After Cleaning: After cleaning and sterilizing, inspect the screwdrivers again to make sure they are clean and in good working condition.
In conclusion, cleaning implant screw drivers is a multi - step process that requires attention to detail. By following these steps, you can ensure that your Implant Screw Drivers are clean, safe, and ready for use in dental procedures. If you have any questions about cleaning or if you're interested in purchasing high - quality implant screw drivers, don't hesitate to reach out for a purchase and negotiation.
References
- Dental Instrument Cleaning and Sterilization Guidelines, American Dental Association
- Manufacturer's Instructions for Implant Screw Drivers and Cleaning Equipment