Replacing the prosthetic on an angled abutment implant is a crucial procedure in dental restoration. As a leading supplier of Angled Abutment Implants, I have witnessed firsthand the significance of this process in achieving optimal patient outcomes. In this blog post, I will share a comprehensive guide on how to replace the prosthetic on an angled abutment implant, covering the necessary steps, considerations, and best practices.
Understanding Angled Abutment Implants
Before delving into the replacement process, it is essential to understand what angled abutment implants are and their role in dental restoration. Angled abutment implants are designed to provide a solution when the natural tooth position or the anatomical structure of the jaw requires an angled connection between the implant and the prosthetic. This angulation can help achieve a more natural-looking and functional restoration, especially in cases where the implant is placed at an angle due to limited bone availability or other anatomical constraints.


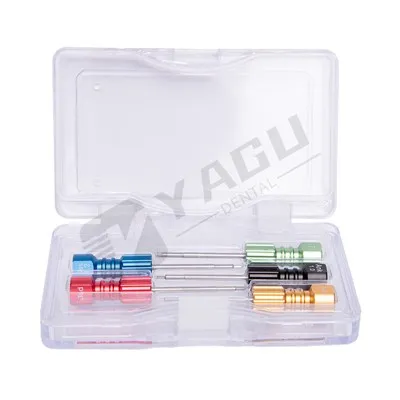
There are various types of angled abutments available in the market, including Angled Multi Unit Abutments, which offer flexibility in terms of angulation and connection options. These abutments can be used in combination with different implant systems and prosthetic materials, making them a versatile choice for dental professionals. Another option is the Hiossen Multi Unit Abutment, which is known for its high-quality construction and compatibility with Hiossen implant systems. Additionally, Straight Abutment is also commonly used in cases where no angulation is required.
Preparing for the Replacement Procedure
The first step in replacing the prosthetic on an angled abutment implant is to conduct a thorough patient evaluation. This includes a detailed clinical examination, radiographic assessment, and review of the patient's medical history. The goal of this evaluation is to identify any potential issues or contraindications that may affect the replacement procedure, such as infection, bone loss, or occlusal problems.
Once the patient has been evaluated, the next step is to select the appropriate prosthetic and abutment components. This decision should be based on several factors, including the patient's oral anatomy, the type of implant system used, the desired esthetics, and the functional requirements of the restoration. It is important to choose high-quality components that are compatible with each other to ensure a successful outcome.
Before proceeding with the replacement procedure, it is also essential to prepare the patient for the process. This includes explaining the procedure in detail, answering any questions or concerns the patient may have, and obtaining informed consent. The patient should also be instructed on how to care for the implant and prosthetic after the replacement to ensure proper healing and long-term success.
Removing the Existing Prosthetic
The first step in the replacement process is to remove the existing prosthetic from the angled abutment implant. This can be done using a variety of tools, depending on the type of prosthetic and the connection mechanism. In some cases, a simple screwdriver or wrench may be sufficient to loosen and remove the prosthetic. However, in other cases, more specialized tools may be required, such as a torque wrench or a removal kit.
When removing the prosthetic, it is important to be gentle and avoid applying excessive force, as this can damage the implant or the abutment. It is also important to ensure that the prosthetic is removed in one piece to avoid leaving any fragments behind. Once the prosthetic has been removed, it should be inspected for any signs of damage or wear, and the abutment should be cleaned and prepared for the new prosthetic.
Inspecting and Preparing the Abutment
After removing the existing prosthetic, the next step is to inspect the angled abutment for any signs of damage or wear. This includes checking the threads, the connection surface, and the overall integrity of the abutment. If any damage or wear is detected, the abutment may need to be replaced to ensure a proper fit and function of the new prosthetic.
Once the abutment has been inspected, it should be cleaned thoroughly to remove any debris, plaque, or calculus. This can be done using a variety of cleaning agents and instruments, such as ultrasonic scalers, brushes, and solvents. After cleaning, the abutment should be dried and disinfected to prevent infection.
In some cases, it may be necessary to adjust the angulation or the height of the abutment to achieve the desired fit and esthetics of the new prosthetic. This can be done using specialized tools and techniques, such as abutment milling or grinding. However, it is important to note that any adjustments to the abutment should be made with caution, as they can affect the stability and function of the implant.
Fitting and Securing the New Prosthetic
Once the abutment has been inspected and prepared, the next step is to fit and secure the new prosthetic. This involves selecting the appropriate prosthetic component and ensuring that it fits properly on the angled abutment. The prosthetic should be seated gently onto the abutment and checked for proper alignment and occlusion.
To secure the prosthetic to the abutment, a variety of methods can be used, depending on the type of prosthetic and the connection mechanism. In some cases, a simple screw or bolt may be used to fasten the prosthetic to the abutment. In other cases, a cemented or bonded connection may be preferred. It is important to follow the manufacturer's instructions when securing the prosthetic to ensure a proper and secure fit.
After the prosthetic has been secured, it is important to check the occlusion and make any necessary adjustments to ensure proper function and comfort. This may involve adjusting the bite, removing any high spots or interferences, and ensuring that the prosthetic is in harmony with the opposing teeth.
Post-Operative Care and Follow-Up
After the replacement procedure, it is essential to provide the patient with proper post-operative care instructions. This includes advising the patient on how to care for the implant and prosthetic, such as brushing and flossing regularly, avoiding hard or sticky foods, and using a mouthwash to keep the area clean. The patient should also be instructed to avoid smoking and excessive alcohol consumption, as these can have a negative impact on the healing process.
It is also important to schedule regular follow-up appointments to monitor the healing process and ensure the long-term success of the replacement. During these appointments, the dentist will examine the implant and prosthetic, check the occlusion, and take any necessary radiographs to assess the bone level and the stability of the implant. Any issues or concerns that arise during the follow-up period should be addressed promptly to prevent complications.
Conclusion
Replacing the prosthetic on an angled abutment implant is a complex but rewarding procedure that can significantly improve the patient's oral health and quality of life. By following the steps outlined in this guide and using high-quality components, dental professionals can ensure a successful outcome and provide their patients with a functional and esthetically pleasing restoration.
If you are interested in learning more about our Angled Abutment Implants or have any questions about the replacement process, please do not hesitate to contact us. We are committed to providing our customers with the highest level of service and support, and we look forward to working with you to meet your dental restoration needs.
References
- Misch, C. E. (2018). Dental Implant Prosthetics. Elsevier Health Sciences.
- Tarnow, D. P., & Cho, S. C. (2017). Implant Dentistry: A Comprehensive Approach. Wiley Blackwell.
- Rosenquist, B. J., & Buser, D. (2016). Contemporary Implant Dentistry. Quintessence Publishing.