As a trusted dental implant tools supplier, I often receive inquiries from dental professionals about the proper steps to assemble dental implant tools. In this blog post, I'll walk you through the essential steps, ensuring that you can assemble these tools accurately and safely.
Step 1: Gather All Necessary Tools and Components
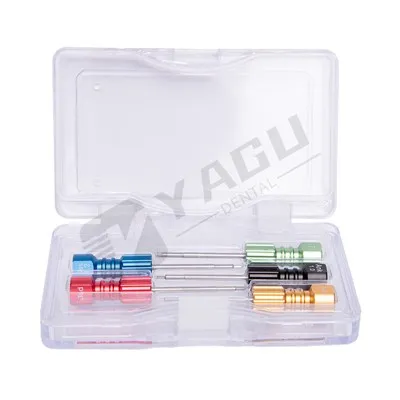
Before you start the assembly process, it's crucial to gather all the required tools and components. This includes items like Implant Screw Drivers, Bone Chip Maker, Dental Implant Screwdriver, implant fixtures, abutments, healing caps, and any other accessories specific to the implant system you're using.
Lay out all the components on a clean, organized work surface. This not only helps you keep track of everything but also reduces the risk of misplacing small parts. Make sure to check the integrity of each component for any signs of damage or defects. If you notice any issues, do not use the damaged parts and contact your supplier for replacements.
Step 2: Familiarize Yourself with the Implant System
Each dental implant system has its own unique design and assembly requirements. It's essential to thoroughly read the manufacturer's instructions and familiarize yourself with the specific implant system you're working with. The instructions will provide detailed information on the proper sequence of assembly, torque values, and any special considerations.
Pay close attention to the compatibility of the components. Different implant systems may have different sizes, shapes, and connection mechanisms. Using incompatible components can lead to improper fit, instability, and potential complications during the implant procedure. If you have any questions or concerns about the implant system, don't hesitate to contact the manufacturer's technical support team or your supplier for guidance.
Step 3: Prepare the Work Area
A clean and sterile work area is essential to prevent contamination of the dental implant tools and components. Clean the work surface with a suitable disinfectant and allow it to dry completely. Use a sterile drape or tray to place the components on during the assembly process.
Wash your hands thoroughly with soap and water and wear sterile gloves to minimize the risk of introducing bacteria. If possible, work in a laminar flow hood or a cleanroom environment to further reduce the risk of contamination.
Step 4: Inspect the Components
Before assembling the tools, carefully inspect each component again to ensure that they are clean, undamaged, and free from debris. Use a magnifying glass or a dental loupe to examine the components for any signs of scratches, burrs, or other imperfections.
Inspect the implant fixtures for proper threading, the abutments for a smooth surface finish, and the healing caps for a proper fit. If you find any issues, do not use the affected components and contact your supplier for replacements.
Step 5: Assemble the Implant Fixture and Abutment
The implant fixture is the component that is surgically placed into the jawbone. The abutment is then attached to the implant fixture to provide a connection for the dental prosthesis.
Start by selecting the appropriate abutment based on the patient's needs and the implant system. Make sure the abutment is clean and dry. Apply a small amount of sterile lubricant or anti - seize compound to the abutment's connection area to facilitate smooth assembly and prevent galling.
Insert the abutment into the implant fixture according to the manufacturer's instructions. Use a torque wrench to tighten the abutment to the recommended torque value. Over - tightening or under - tightening the abutment can lead to problems such as screw loosening, implant failure, or damage to the components.
Step 6: Attach the Healing Cap
The healing cap is placed on the abutment to protect the implant site during the healing period. Select the appropriate healing cap based on the size and type of the abutment. Make sure the healing cap is clean and dry.
Place the healing cap on the abutment and gently press it down until it fits snugly. The healing cap should be securely attached to the abutment to prevent it from dislodging during the healing process.
Step 7: Check the Assembly
Once you have assembled the implant fixture, abutment, and healing cap, carefully check the assembly for proper fit and alignment. Gently wiggle the components to ensure that there is no excessive movement or looseness.
Check the height and angulation of the abutment to ensure that it is in the correct position for the future dental prosthesis. If you notice any issues with the fit or alignment, disassemble the components and reassemble them, following the proper procedure.
Step 8: Sterilize the Assembled Tools
After assembling the dental implant tools and components, they need to be sterilized to ensure their safety and effectiveness. Follow the manufacturer's instructions for the proper sterilization method. Common sterilization methods include autoclaving, chemical sterilization, and dry heat sterilization.
Make sure to use the appropriate sterilization cycle and parameters for the specific components. Over - sterilization or under - sterilization can damage the components or fail to eliminate all the microorganisms. After sterilization, store the assembled tools in a clean, dry, and sterile container until they are ready to be used.
Step 9: Verify the Sterilization
It's important to verify that the sterilization process was successful. Use appropriate sterilization indicators, such as biological indicators or chemical indicators, to confirm that the tools have been properly sterilized.
Biological indicators contain live spores that are highly resistant to sterilization. If the spores are killed during the sterilization process, it indicates that the sterilization was effective. Chemical indicators change color or appearance in response to the sterilization conditions, providing a visual indication of whether the sterilization cycle was completed correctly.
Step 10: Document the Assembly and Sterilization
Keep detailed records of the assembly process, including the date, time, implant system used, components assembled, torque values, sterilization method, and results of the sterilization verification. Documentation is essential for quality control, traceability, and compliance with regulatory requirements.
Maintain a logbook or use an electronic record - keeping system to record all the relevant information. This documentation can be useful in case of any issues or complications during the implant procedure or for future reference.


Conclusion
Assembling dental implant tools is a precise and critical process that requires careful attention to detail. By following these steps, you can ensure that the dental implant tools are assembled correctly, safely, and in accordance with the manufacturer's instructions.
As a dental implant tools supplier, we are committed to providing high - quality products and excellent customer service. If you have any questions or need further assistance with the assembly of dental implant tools, please feel free to contact us. We are here to support you in your dental implant procedures and help you achieve the best possible outcomes for your patients. Whether you are a new dental professional just starting to work with dental implants or an experienced practitioner looking for a reliable supplier, we invite you to contact us for more information about our products and services. We can discuss your specific needs, provide product samples, and assist you in finding the right dental implant tools for your practice. Let's work together to improve the oral health of your patients.
References
- Manufacturer's instructions for dental implant systems
- Dental implant industry standards and guidelines
- Scientific literature on dental implantology