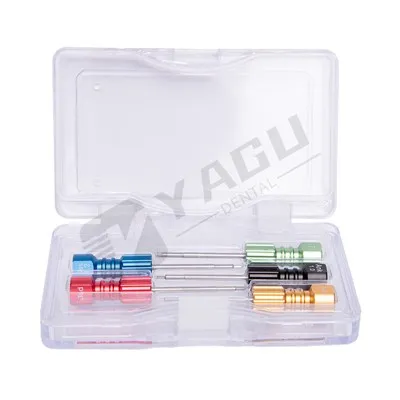
Hey there! As a supplier of Implant Screw Drivers, I often get asked about how to adjust the torque of these handy tools. So, I thought I'd share some insights on this topic.
First off, let's talk about why adjusting the torque of implant screw drivers is so important. When it comes to dental implants, getting the right torque is crucial. If the torque is too low, the screw might not be tightened properly, which can lead to loosening over time. On the other hand, if the torque is too high, it can cause damage to the implant or the surrounding bone. So, finding that sweet spot is key.
Now, there are a few different ways to adjust the torque of implant screw drivers. One of the most common methods is using a torque-limiting device. These devices are designed to stop the driver from applying too much torque. They work by using a clutch mechanism that disengages when the preset torque level is reached. It's like having a built - in safety net for your implant installation.
Most of the Implant Screw Drivers we supply come with the option to use a torque - limiting attachment. It's pretty straightforward to use. You just attach it to the driver, and then set the desired torque level according to the specifications of the implant you're working with. Different implants have different recommended torque values, so it's always a good idea to check the manufacturer's guidelines.
Another way to adjust the torque is through the use of a digital torque screwdriver. These are more high - tech options that allow for very precise torque adjustment. With a digital screwdriver, you can set the exact torque value you need on a digital display. They're great for situations where you need a high level of accuracy, like when working with delicate implants or in complex dental procedures.
Our Dental Implant Screwdriver range includes some really nice digital models. They're easy to operate, and the digital readout makes it simple to ensure you're applying the right amount of torque every time.
When you're adjusting the torque, it's also important to consider the type of screw you're using. Different screws have different thread designs and materials, which can affect how they respond to torque. For example, a self - tapping screw might require a different torque setting compared to a regular screw. You need to take these factors into account to get the best results.
Let's talk about the process of actually adjusting the torque step by step. First, make sure your screwdriver is clean and in good working condition. A dirty or damaged screwdriver can affect the accuracy of the torque adjustment. Then, if you're using a torque - limiting device, attach it securely to the driver.
Next, set the torque level. If it's a mechanical torque - limiting device, you'll usually adjust it by turning a dial or a knob until you reach the desired value. For a digital screwdriver, you'll use the buttons on the display to set the torque.
Once you've set the torque, it's a good idea to do a test run on a practice piece or a similar implant. This will help you confirm that the torque setting is correct and that the screwdriver is working as expected.
During the actual implant installation, apply the torque gradually. Don't just go full - force right away. This gives the screw time to seat properly and reduces the risk of over - tightening. Keep an eye on the feedback from the screwdriver. If you feel any resistance or if the screwdriver seems to be struggling, stop and double - check the torque setting.
It's also important to note that the environment can play a role in torque adjustment. For example, if the implant site is wet or if there's debris present, it can affect the friction between the screw and the implant, which in turn can affect the torque. So, make sure the area is clean and dry before you start.
Now, let's touch on some common mistakes to avoid when adjusting the torque. One of the biggest mistakes is not following the manufacturer's recommendations. Each implant and screwdriver has its own set of guidelines, and ignoring them can lead to problems down the road.
Another mistake is not calibrating the screwdriver regularly. Over time, the accuracy of the torque adjustment can drift, especially if the screwdriver is used frequently. Make sure to calibrate it according to the manufacturer's instructions to maintain its accuracy.


As a supplier, we understand that our customers need reliable tools and clear guidance. That's why we're always here to answer any questions you might have about adjusting the torque of our Implant Screw Drivers.
We also offer other related products that can be useful in dental implant procedures. For example, our Bone Chip Maker is a great tool for harvesting bone chips, which can be used in bone grafting procedures.
If you're in the market for high - quality implant screw drivers or other dental implant tools, we'd love to talk to you. Whether you're a dental professional looking to upgrade your toolkit or a distributor interested in our products, we're here to help. We can provide you with detailed product information, pricing, and any other support you need.
So, if you're interested in learning more or making a purchase, don't hesitate to reach out. We're committed to providing the best products and services to our customers. Let's work together to make your dental implant procedures as successful as possible.
References
- Dental Implant Handbook: A Comprehensive Guide to Implantology.
- Manufacturer's manuals for Implant Screw Drivers and related dental tools.